You can create and manage stock silos on Propeller. To do this, navigate to Stock Management > Manage Stock.
_____________________________________________________________________________________________________________________________________
Create Stock Silo
To create a stock silo, select Create New. Here you can enter the silo's Name, a Description and select whether the silo is a Warehouse or an engineer's Van (the engineer will have to be created in Propeller first).
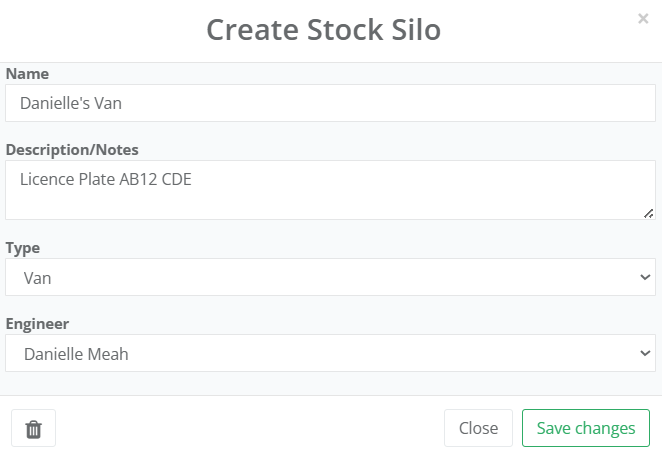
Once these details have been added, select Save Changes.
_____________________________________________________________________________________________________________________________________
Stock Silo Functions
Filter Stock Silos
You can filter your stock silos via the Search Bar or the Show Advanced Filter button. When the Advanced Filter is selected, you can filer by the following:
- Modified Date
- Created Date
- Type (Warehouse/Van)
- Engineer
Select Apply Filter to load the silos that fall under the chosen filters.
Additionally, you can also export the list of silos with the current filter applied by selecting the CSV icon in the Documents section.
Edit Stock Silo
To edit a silo, select the Edit icon.

Here you can make changes in a similar format to creating the silos. Once the desired changes have been made, select Save Changes.
Copy Stock Silo
If multiple silos require the same stock, you can create one silo and clone it as many times as required. To do this, select the Copy icon.

Here you can enter details similar to creating a silo, including allocating it to an engineer. The Description will automatically be filled with the date the silo was copied, however this can be changed.
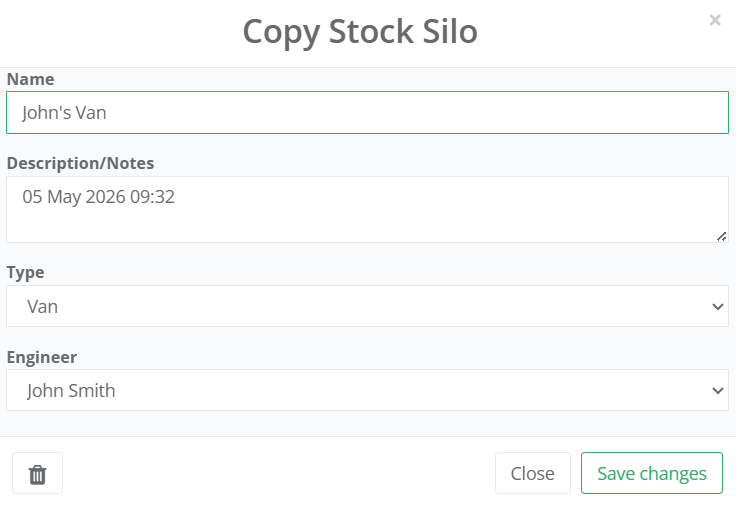
To confirm cloning the silo, select Save Changes.
Delete Stock Silo
To delete a stock silo, select the Edit icon on the silo you would like to remove.

This will open the Edit page. Select the Bin icon in the bottom left to delete it and then OK to confirm. Please note that before deleting the silo we recommend moving parts allocated to the silo to another silo by editing the Part Quantities. Quantities allocated to the current silo will be inaccessible once it is deleted, however you can restore the silo and the associated Parts/Quantities if needed.
Restore Stock Silo
To restore a deleted silo you will first have to toggle the Show Deleted Silos option. This will display all previously deleted silos.

Then select the Restore icon on the desired silo.

_____________________________________________________________________________________________________________________________________
Manage Silo Stock
Manage Stock
Once the stock silo has been created, the required stock can be allocated from the Parts Catalogue (more information regarding the Parts Catalogue can be found here). To do this, select the Stock Editor icon on the required stock silo.

This will then load a tabular view of the parts catalogue. To include parts in this silo, click the tick box in the Included column enter the number of parts in the Quantity section (this can be done by entering the number manually or selecting the + and - button). Parts included will be saved to the silo automatically.
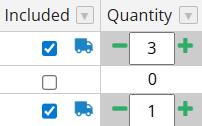
The current view of the parts catalogue can be filtered as required by either the Filter Stock search bar, or by selecting the drop down arrow on the specific column you would like to filter.

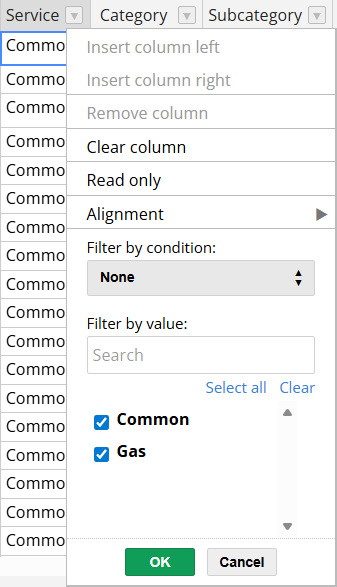
You can view the stock currently assigned to the silo by selecting Hide Stock not in this Silo. You can revert back to the original page by then selecting Show all Stock.


You can export a CSV list of the parts with the current filters applied by selecting the Excel icon.
Transfer Stock Between Warehouses and Vans
You can easily transfer stock from warehouse silos to vans. To do this, select the Stock Editor icon that corresponds to the warehouse you would like to move stock from.

Stock that is available in that warehouse will be marked with a Blue Van icon. Previously existing stock that has now reached a quantity of zero will be marked with a Grey Van. You will only be able to transfer stock that has an existing quantity.
Click the Blue Van icon of the part you would like to transfer.

This will then open the menu to allocate the stock to another silo. You can select the plus or minus icons to allocate the stock. The quantity of that stock in the warehouse you are currently editing is displayed under Head Office Quantity - this number will automatically update with your changes.
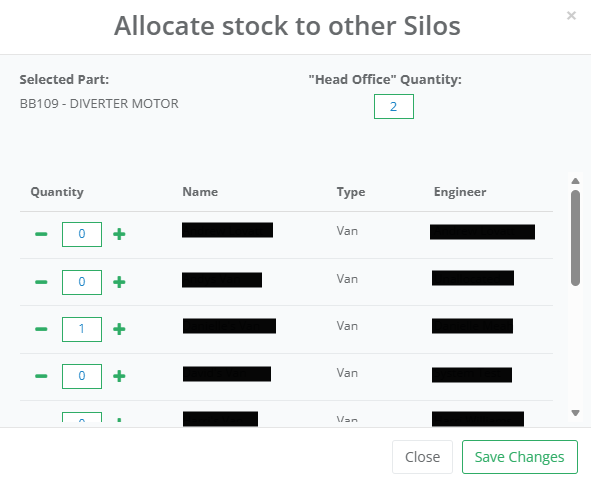
Once you have made your desired updates, select Save Changes.
_____________________________________________________________________________________________________________________________________
View All Stock
Select View All Stock to see all parts registered on the system.
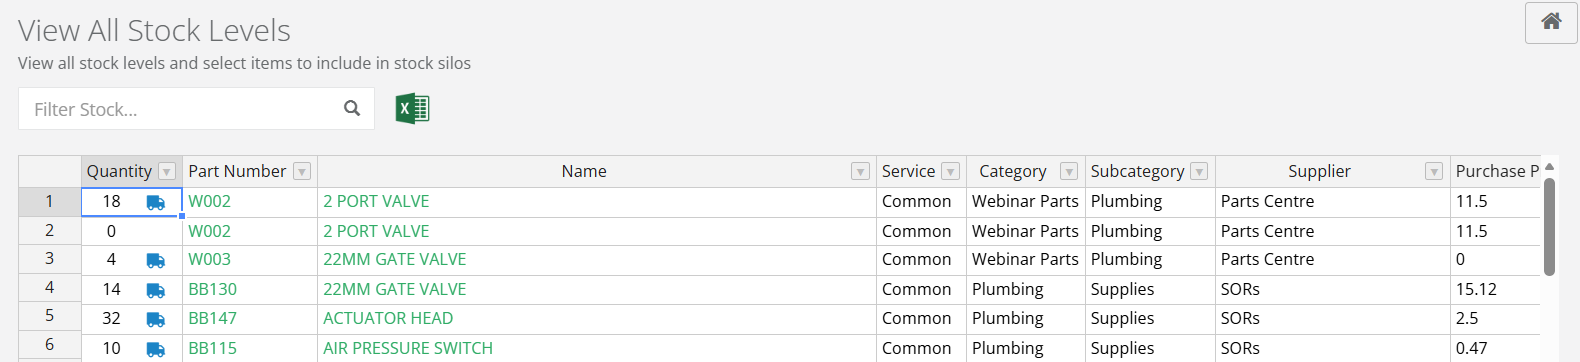
You can search stock by using the search bar. Additionally, you can export a list of the stock by selecting the Excel icon.
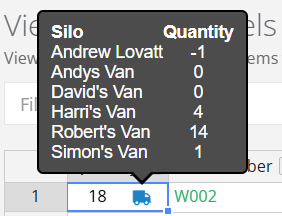
In the Quantity column, you can hover over the Blue Van Icon to see what silos the stock is associated to and how much.
Was this article helpful?
That’s Great!
Thank you for your feedback
Sorry! We couldn't be helpful
Thank you for your feedback
Feedback sent
We appreciate your effort and will try to fix the article