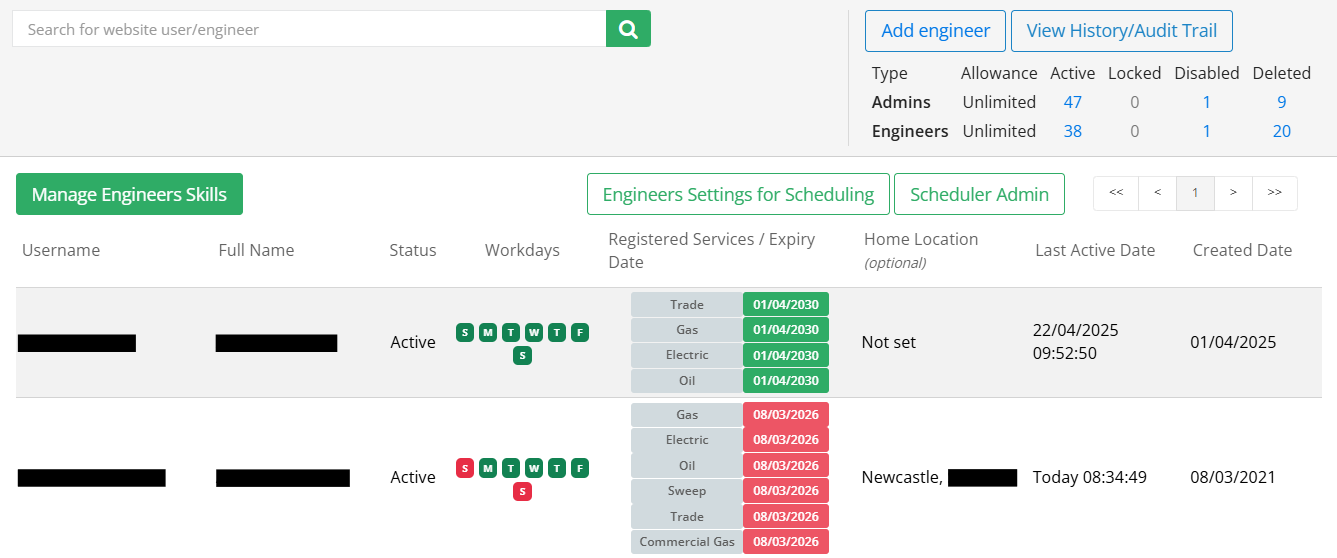
To manage your Engineers, navigate to Settings > User Manager > Engineers. This will display all the current existing engineers.
_____________________________________________________________________________________________________________________________________
Create an Engineer
On the right-hand side of the interface, select Add Engineer.
Enter the details of the engineer as required Fields marked with an asterisk (*) are mandatory.
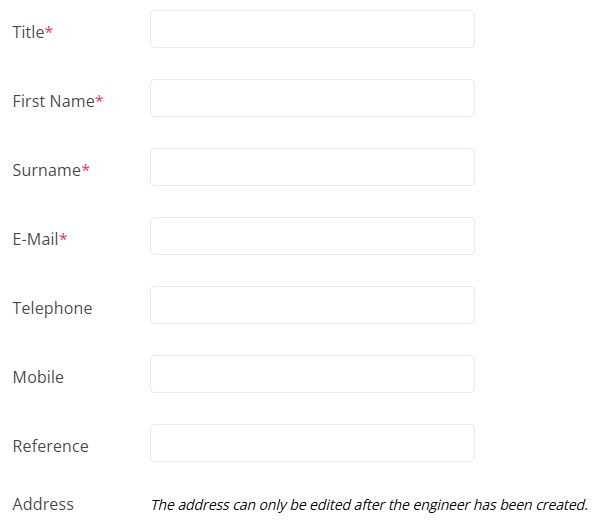
The address can only be added after the engineer has been created. This is due to the address contributing to scheduling visits depending on the visit location and the location that the engineer is based. More about scheduling can be found in the Scheduling folder.
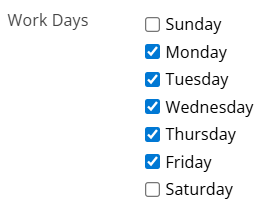
You can then select the working days of the engineer by toggling the box to the corresponding days. If a day is not selected you will not be able to schedule work to the engineer on that day.
You can also select how to provide the engineer with a link to set up their password. This can be done via Email or SMS Text Message. As the engineer's mobile details is an optional field, a valid phone number will have to be provided to send the link by SMS.

You can also define the labour costs for the engineer. The following can be assigned a cost:
- Travel Cost Rate Per Hour - This calculates the travel cost based on the mileage travelled from when the On My Way button is pressed and when the engineer starts the visit.
- Travel Cost Rate Per Mile - Cost of travel per hour for the engineer. If the engineers use the On My Way feature on the app, it will calculate the distance spent travelling to a visit up until the engineer starts the visit.
- Hourly Cost Standard - The standard labour cost of this engineer. This is calculated from when the engineer starts the visit in the app to when the engineer submits the visit as complete.
- Hourly cost O/T 1.5 - Time and a half over-time cost for the engineer.
- Hourly cost O/T 2 - The double time cost for the engineer.
Furthermore, you can also define the following charge rates if the work is chargeable to an customer:
- Hourly Charge Standard - The standard labour charge. Calculated the same as the Hourly Costs.
- Hourly Charge O/T 1.5 - Time and a half over-time charge for the engineer.
- Hourly Charge O/T 2 - The double time charge for the engineer.
You can also set up the engineer for scheduling. You can do this by toggling the Enabled for Scheduling option. Note: You will have to add Service Certificates to the engineer to assign them to work. You can find more about this below.
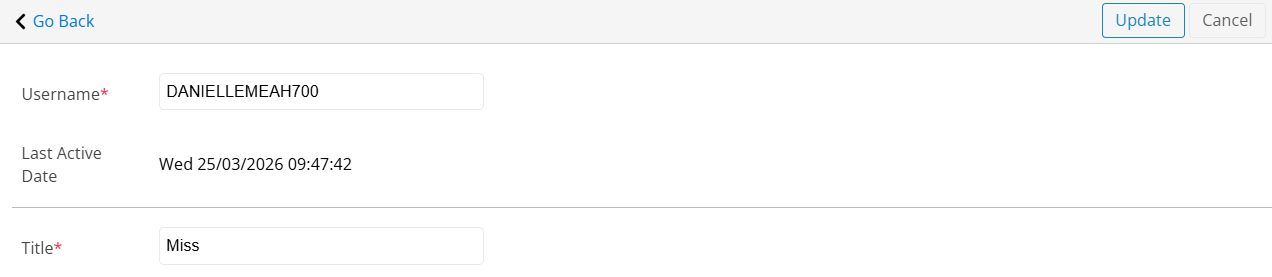
 Once the details have been entered, select Save to add the engineer. A username will be automatically generated, however this can be changed by selecting Edit.
_____________________________________________________________________________________________________________________________________
Engineer Service Certificates
At the top is a search function to find the engineer you are looking for. You can search for either the Username or Full Name of the user. Go to the engineer's profile by selecting their Username.
To the right of the engineer's profile you will find the list of services that the engineer can provide in the Service Certificates section. These are required to allow the engineer to be assigned to work. At least one certificate must be added to an engineer or they will not be able to access the app.

Select Add New to assign a service. Here you can then select the service you would like to add via the drop down.
The Valid To and From dates can either be entered manually using the dd/mm/yyyy format or by selecting the calendar icon. The defined dates must encompass the current date you would like to schedule the engineer for.
You can also optionally add the Registration for the certificate for your company records and any Notes.

Once these details have been entered select Insert.
To remove a certificate simply press the rubbish bin icon to the right of the certificate.

_____________________________________________________________________________________________________________________________________
Edit an Engineer
Whilst viewing the engineer's profile select Edit to make changes. Here you can edit the details in a similar format to creating the engineer. Once the desired changes have been made select Update.
_____________________________________________________________________________________________________________________________________
Delete an Engineer
Select Delete on the engineer's profile. You will then be informed if the engineer has any assigned visits. If there are, you will then be able to either mark these visits as Unassigned or assign them to another engineer via the drop down. Once this has been done, select Continue.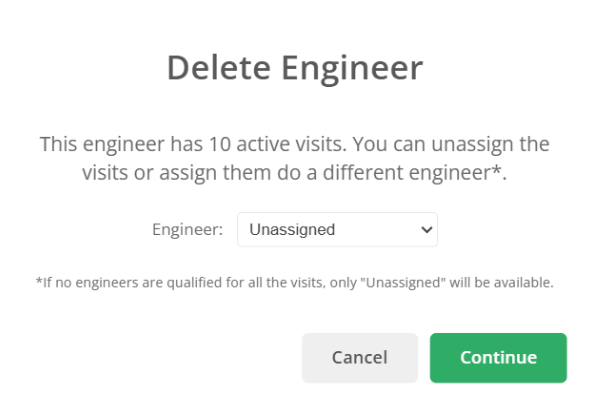
When the engineer has been deleted their profile will still be visible on your company's account but they will no longer be able to sign in. Additionally, visits can no longer be assigned to them.
_____________________________________________________________________________________________________________________________________
Reactivate an Engineer
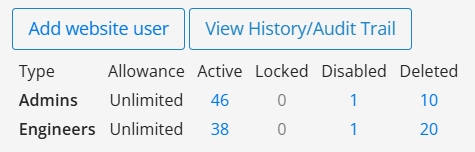
You can view all disabled/deleted engineers users via the grid in the top right. This will total all the website users and engineers that have been disabled/deleted. To view a list of these engineers select the corresponding number in the grid.
Once on this page select the engineer you would like to reactivate by clicking on their username.
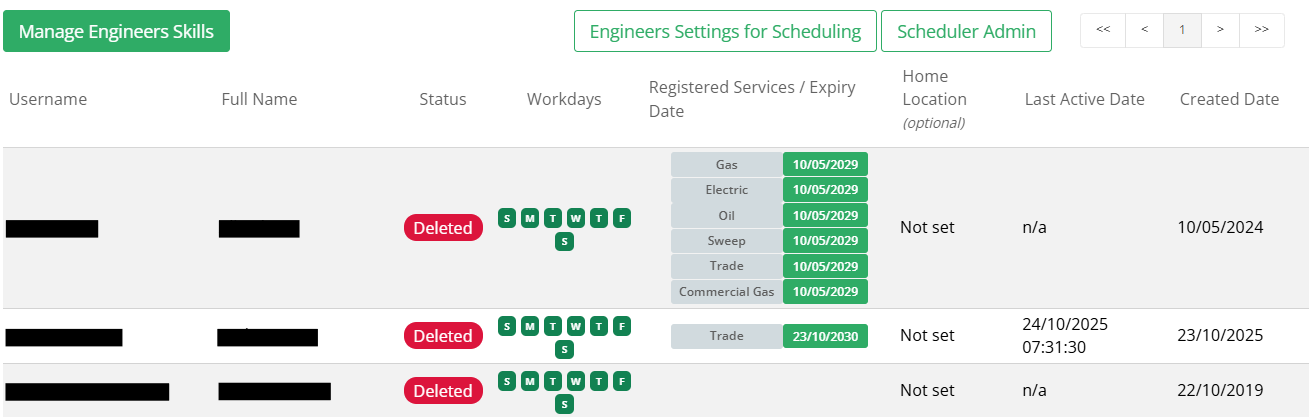
There will now be a banner displayed on their profile alerting you that the engineer has been deleted. Select Activate to enable the account again.

_____________________________________________________________________________________________________________________________________
You can also create and manage engineer's skills. More about skills can be found here.
Was this article helpful?
That’s Great!
Thank you for your feedback
Sorry! We couldn't be helpful
Thank you for your feedback
Feedback sent
We appreciate your effort and will try to fix the article